Working with files in Power Apps becomes surprisingly difficult once you move beyond basic SharePoint scenarios.
Uploading a file is easy.
But the moment you need to:
- handle large files
- avoid SharePoint attachment limitations
- integrate with Azure services
- build scalable storage solutions
- control file access securely
- support enterprise integrations
👉 the default attachment experience quickly becomes limiting.
That is where Azure Blob Storage becomes incredibly powerful.
In this guide, you’ll learn how to upload files from Power Apps directly into Azure Blob Storage step by step using the Azure Blob connector.
This approach gives you:
- scalable cloud storage
- secure file access
- support for large files
- better integration possibilities
- cleaner enterprise architecture
And most importantly:
👉 you are no longer dependent on traditional SharePoint attachment limitations.
Why Azure Blob Storage Matters in Power Apps
For small apps, SharePoint attachments may be enough.
But enterprise applications often require:
- scalable storage
- secure external access
- API integrations
- large file support
- centralized file management
- integration with Azure services
This is where Azure Blob Storage becomes a much better fit.
Azure Blob Storage is designed specifically for storing files at scale.
Instead of storing files directly inside SharePoint lists or Dataverse tables, files are stored inside Azure Storage containers and accessed securely through URLs and permissions.
This creates significantly more scalable and flexible architectures.
Especially for:
- document management
- inspection photos
- AI processing
- ERP integrations
- customer uploads
- image storage
- enterprise workflows
What You Will Build
In this tutorial, you will:
- create an Azure Storage Account
- create a Blob Container
- configure permissions
- connect Power Apps to Azure Blob Storage
- upload files directly from Power Apps
- retrieve uploaded files
- understand best practices for scalable file handling
By the end, you will have a working enterprise-grade file upload solution inside Power Apps.

Step 1: Create an Azure Storage Account
Start by opening the Azure Portal.
Create a new:
Storage Account
Inside Azure:
- Click Create Resource
- Search for: Storage Account
- Click Create
Now configure:
- Subscription
- Resource Group
- Storage Account Name
- Region
- Performance settings
For most Power Apps scenarios Standard Performance is enough.
Once configured:
👉 click Review + Create
👉 then click Create
After deployment finishes, open your new Storage Account.

Step 2: Create a Blob Container
Inside your Storage Account:
- Open:
Data Storage → Containers
- Click:
Container
Now define:
- Container name
- Access level
For secure enterprise apps:
✅ keep the container private
Example:
attachments
Then click:
Create
This container will store all uploaded files from Power Apps.

Step 3: Configure Permissions
Now you need to allow Power Apps to access the storage account securely.
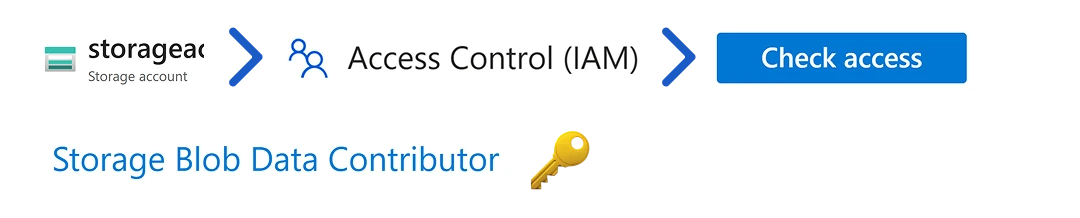
Inside the Storage Account:
- Open:
Access Control (IAM)
- Click:
Add Role Assignment
Assign:
Storage Blob Data Contributor
This role allows:
- upload
- read
- update
- delete
for blob files.
This is one of the most important steps.
Without correct permissions:
👉 Power Apps will not be able to upload files successfully.
Step 4: Add the Attachment Control in Power Apps
Now move into Power Apps.
Add an:
Attachment Control

If you cannot find it directly:
- Insert an Edit Form
- Connect it to any data source
- Add the Attachments field
- Copy the attachment control
- Paste it onto your screen
- Remove the form if needed
This gives you a standalone upload experience.
Users can now select files directly inside the app.
Step 5: Add the Azure Blob Storage Connector
Next:
- Open:
Data → Add Data
- Search for:
Azure Blob Storage
- Add the connector
- Authenticate with Azure
Once connected, Power Apps can communicate directly with your Azure Storage Account.

Step 6: Upload Files to Azure Blob Storage
Now create an upload button.
Inside the button OnSelect property:
AzureBlobStorage.CreateFile(
    "attachments",
    First(AttachmentControl.Attachments).Name,
    First(AttachmentControl.Attachments).Value
)
Here is what happens:
- "attachments" → container name
- .Name → original file name
- .Value → file content
Once triggered:
👉 the file uploads directly into Azure Blob Storage.
This is already significantly more scalable than relying only on SharePoint attachments.
Step 7: Retrieve Uploaded Files
Once files exist inside Azure Blob Storage, you can retrieve them inside Power Apps.
For example:
AzureBlobStorage.GetFileContent(
    "attachments",
    "myfile.png"
)
Or dynamically:
AzureBlobStorage.GetFileContent(
    "attachments",
    varFileName
)
This allows you to:
- display images
- download documents
- preview files
- send files into APIs
- process files in Power Automate
directly from Azure Storage.
Step 8: Display Uploaded Files
You can now bind retrieved files into controls.
For example:
- Image controls
- PDF viewers
- Download buttons
- Galleries
Example for images:
ImageControl.Image =
AzureBlobStorage.GetFileContent(
    "attachments",
    varFileName
)
Now Power Apps becomes a true file management frontend instead of only a form application.

Why This Architecture Is Powerful
This approach removes many limitations commonly seen in Power Apps projects.
Instead of relying heavily on:
- SharePoint attachments
- Dataverse file columns
- email attachments
you now have:
✅ scalable cloud storage
✅ centralized file management
✅ Azure integrations
✅ API-ready architecture
✅ secure role-based access
✅ better scalability
✅ support for large files
This becomes extremely valuable in enterprise solutions.
Real-World Use Cases
This pattern works extremely well for:
- inspection photo uploads
- customer onboarding documents
- invoice storage
- AI document processing
- ERP integrations
- HR onboarding systems
- engineering documentation
- IoT image uploads
- manufacturing reporting
- field service applications
Especially in enterprise environments where file storage requirements become more complex.
Best Practices
When using Azure Blob Storage with Power Apps, I strongly recommend:
Validate File Types
Always validate:
- PNG
- JPG
- DOCX
before upload.
Validate File Size
Large files can affect:
- app performance
- connector limits
- upload speed
- Store Metadata Separately
Keep:
- file name
- upload date
- owner
- related business record
inside:
- Dataverse
- SQL
- SharePoint
while storing the actual file in Azure Blob Storage.
Use Secure Containers
Avoid public containers for enterprise apps.
Use:
- Azure roles
- managed identities
- SAS tokens (when needed)
for secure access.
Use Azure Functions for Advanced Scenarios
For:
- image processing
- virus scanning
- AI integrations
- PDF generation
- advanced security
consider using Azure Functions between Power Apps and Blob Storage.
Common Mistakes
Some common issues I often see:
- storing large files directly in SharePoint
- exposing public blob containers
- not validating file types
- using inconsistent naming conventions
- mixing metadata and file storage improperly
Good architecture matters even in low-code solutions.
Final Thoughts
Azure Blob Storage unlocks a completely different level of scalability for Power Apps.
Instead of treating Power Apps as only a form platform, you start building:
- enterprise architectures
- scalable integrations
- cloud-native solutions
- API-connected systems
This is where Power Platform becomes significantly more powerful.
Especially when combined with:
- Azure Functions
- Power Automate
- SQL
- Dataverse
- AI services
- custom APIs
And the best part: 👉 the implementation itself is surprisingly simple once the architecture is understood.
Final Thoughts
If your Power Apps solution needs scalable file handling:
👉 use Azure Blob Storage.
It gives you flexibility, scalability, security, and much cleaner enterprise architecture.
One Honest Question
How are you currently handling files in your Power Apps solutions? 👇